


If you’re thinking about simplifying your business setup, making the switch from MailerLite to Hubsy is one of the smartest decisions you can make as a freelancer.
Hubsy is the all-in-one business platform that combines CRM, email marketing, automations, and scheduling in one connected system so you can see your subscribers, clients, and workflows in one place.
The switch from MailerLite to Hubsy is easier than you might think — especially if you follow this simple step-by-step guide.
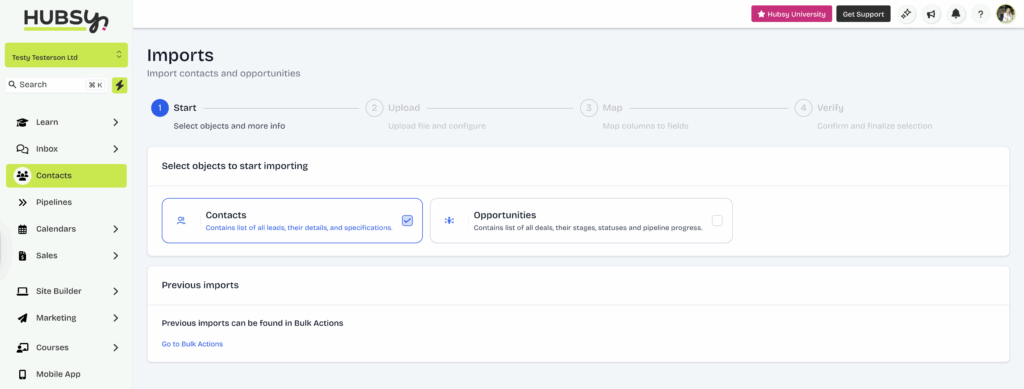
Step 1: Export your contacts from MailerLite
Start by downloading a CSV of all your subscribers from MailerLite.
Before uploading, give it a quick clean-up: remove duplicates, inactive subscribers, and test emails.
Then upload it into Hubsy's Contacts list. You can import tags and segment contacts into ‘Smart Lists' straight away, so everything stays organised from the start.
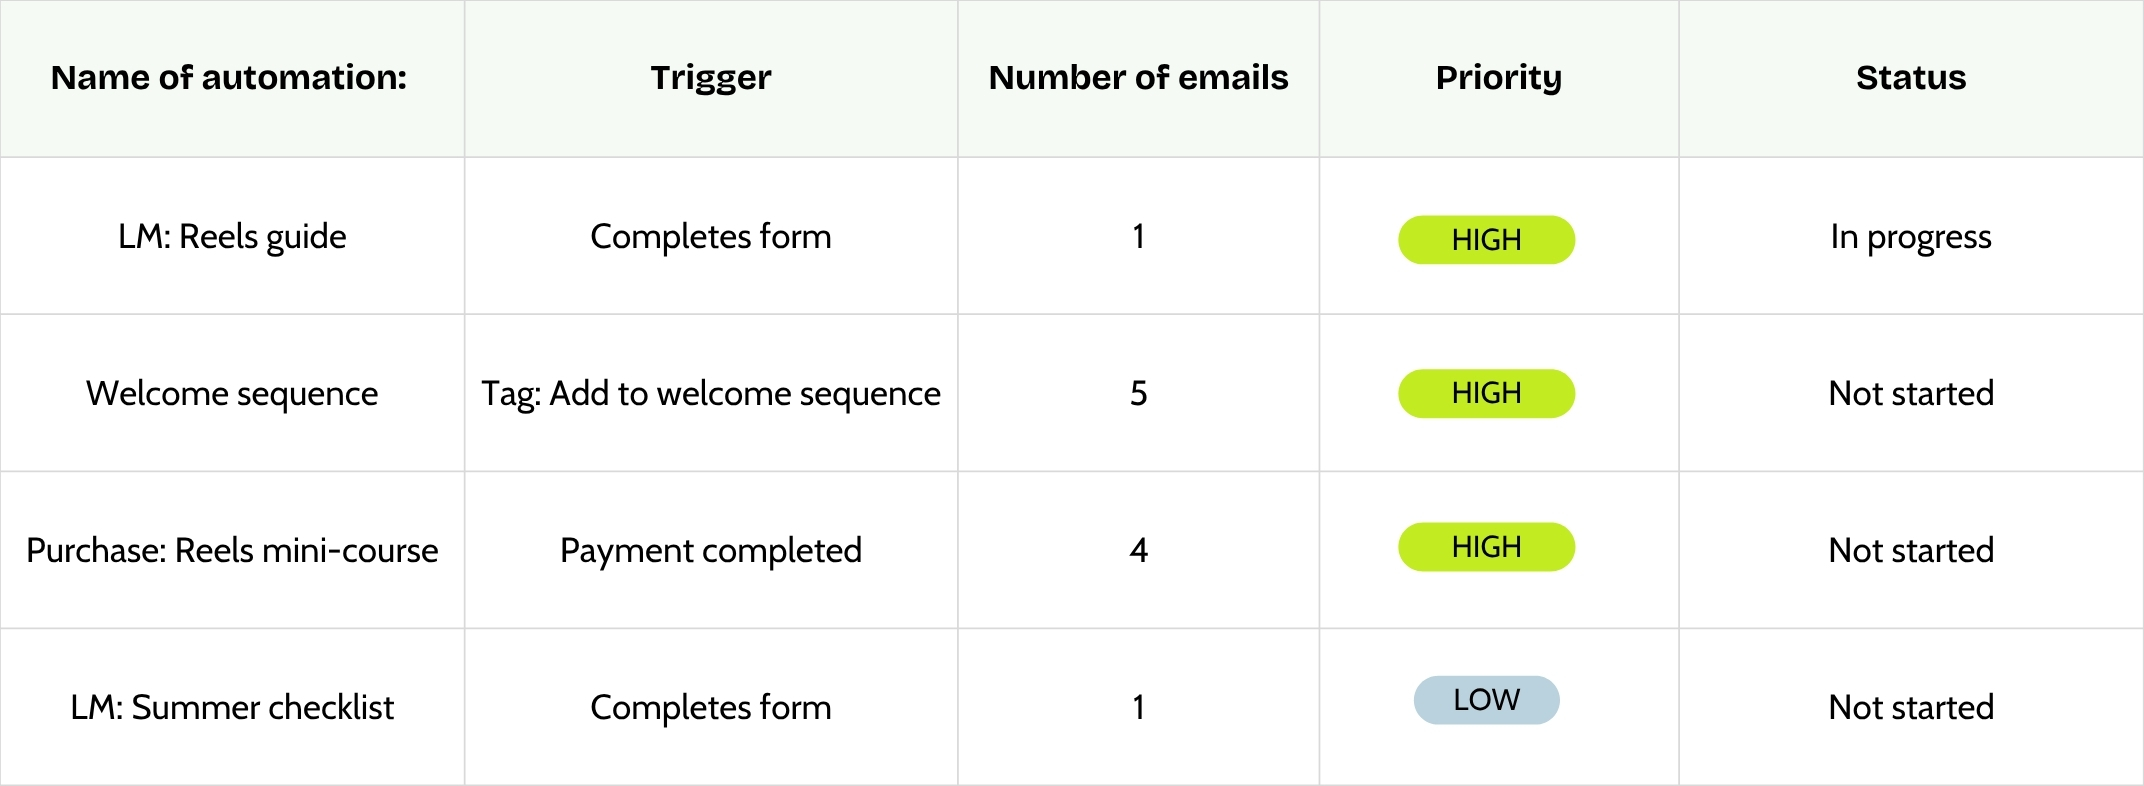
Step 2: Export your MailerLite automations
MailerLite doesn’t let you export automations directly, so this step is manual, but it's not as complicated or time-consuming as you might think.
Before touching anything in Hubsy, make a list of all your MailerLite automations.
Think about:
- Welcome sequences
- Lead magnet delivery workflows
- Client onboarding or offboarding sequences
- Abandoned checkout or sales follow-ups
Then list them in order of priority (the automations you need immediately being highest). Start with your most active or income-generating workflows first, usually your lead magnet delivery or welcome sequence.
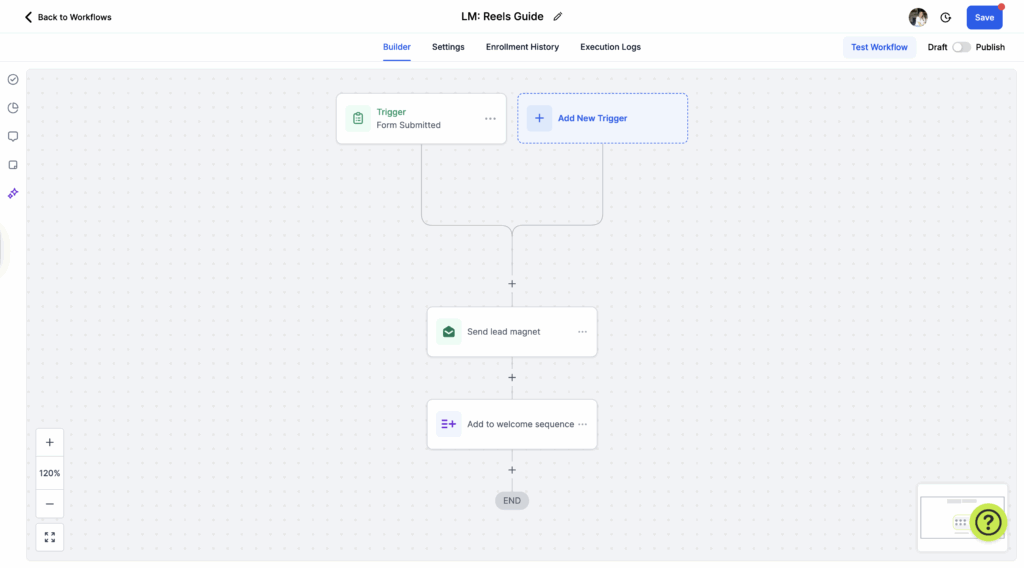
Step 3: Switch your automations from MailerLite to Hubsy
Now it’s time to start setting up your workflows inside Hubsy.
Head to Marketing → Automated Workflows and map out the triggers and actions for each sequence. Don’t think about the email content yet; for now, we're just building the bones.
For example, your workflow might look like this:
- Trigger: Form submission or tag added
- Action: Send email → Wait 2 days → Send next email → Update tag → Notify you
The goal here is to map out the steps, so when you paste in your content, everything’s ready to go.
Step 4: Create an email template in Hubsy
To make it easier to add your email content, start by creating a reusable email template.
Go to Marketing → Emails → Templates and set up your default layout — logo, brand colours, footer, social links, etc.
You can create unlimited templates in Hubsy (for newsletters, automations, or promotions) so your emails will always look consistent and take seconds to build.
Step 5: Copy and paste your email content into Hubsy
Now grab the content from each MailerLite automation email and paste it into your Hubsy workflow steps using your new template.
Quick tips:
- Use Hubsy’s custom values to include subscriber names or information from custom fields.
- Verify any links to ensure they are still active, and update old links with new ones.
- Keep your email subject lines and preheaders the same for now so testing is easier.
Step 6: Test everything before going live
Once everything’s copied over, it’s time to test.
Create a dummy contact record with your own email address and run through the full workflow.
Check:
- All emails are sent in the correct order and at the right times
- Tags update correctly
- Any conditional logic or paths work as intended
- Unsubscribe links and footers display (and work) properly
When it all looks good, publish your workflows and celebrate!
Bonus tips for a seamless switch from MailerLite to Hubsy
- Tag contacts who’ve already completed workflows so they don’t go through them again.
You can also use custom fields to mark workflow status. - Start simple. You don’t need to rebuild everything, just the automations that bring leads or clients through your most important journeys.
- Clean up as you go. Moving systems is the perfect excuse to remove old tags, outdated sequences, or anything that no longer serves your business.
- Track performance. Hubsy’s analytics dashboard makes it easy to see open rates, clicks, and conversions, so keep an eye on the results to ensure everything’s working even better than before.
Final thoughts
Making the switch from MailerLite to Hubsy might feel like a big job, but it’s a one-time move that saves hours every week. Once your email automations live inside Hubsy, alongside your CRM, invoices, and client systems, your whole business (and brain) will feel so much cleaner.
Wondering what else Hubsy does? Don't miss these 8 cool Hubsy features!


")
")
")
")


